By Eric Marshall
Get more out of Power BI Slicers
The slicer visual in Power BI is a simple, yet powerful means of selecting criteria to filter your reports.
Here are two useful tips on how to get more out of this visual:
Tip #1: Turn Off Single Select
By default, Power BI slicers behave slightly different to their table filter counterparts in Excel. When a slicer is created in Power BI, multiple items can only be selected if the user holds the control key down on their keyboard while clicking.
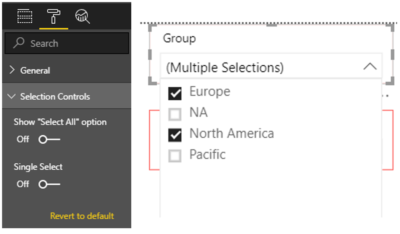
To more easily select multiple criteria from a slicer, select the slicer and then turn off the “Single Select” toggle underneath Format/Selection Controls as per the below:
Tip #2: Turn On Slicer Search
Table filter search capability in Excel is very useful when dealing with lots of items that are appearing in your slicer window.
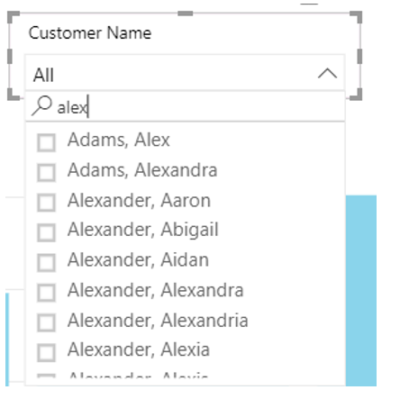
To replicate this functionality in Power BI, click the “…” icon in the top right hand corner of the slicer and select “Search”. Note that when you click the “…” icon again, a tiny yellow bar will appear on the left to indicate that the search capability has been activated:
To filter the items that appear in the slicer drop-down list, click “All”. Click in the white area to the left of where a new magnifying glass icon has appeared, and then begin typing to filter the slicer accordingly.
To find out more about the Amazing capabilities of Power BI check it out here.


