Refreshing Power BI Reports with a Button Using Power Automate
By Simone Palmas
Want to keep your Power BI reports up-to-date without waiting for scheduled refreshes? Now, you can manually refresh your report directly from the report interface using Power Automate. Below, Access Analytic team member Simone Palmas has created a step-by-step guide to set it up.
Setting up Manual Refresh in Power BI
Step 1: Build and Publish Your Report and set up the manual refresh
1. Create Your Report: Design and build your report in Power BI Desktop as usual. Once you are satisfied with your report, publish it to the Power BI Service.
2. Set Up the Refresh: After publishing, select the semantic model and configure the refresh (more details at the end, if you don’t have this set up). You may need to enter your data source credentials or set up an on-premises gateway [Click here to learn how to do this].
Step 2: Add a Power Automate Visual
1. Insert the Visual: In Power BI Desktop, go to the report where you want to add the refresh button. Select “Add Visual” and then choose “Power Automate for Power BI”.
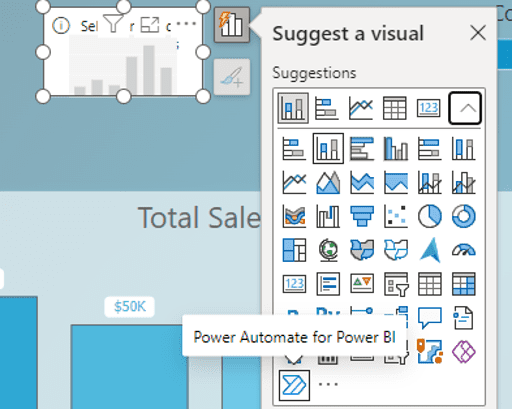
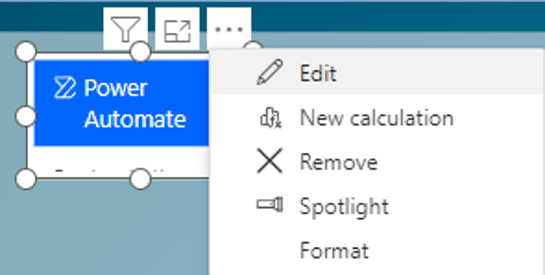
2. Edit the Visual: Click on the Power Automate visual and then click the “More options” icon (three dots) in the top right corner of the visual, and select “Edit”. Wait a few seconds for the Power Automate interface to load.
Step 3: Create the Flow
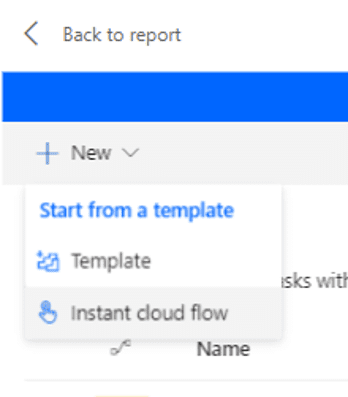
1. Start a New Flow: In the Power Automate panel, select “New” and then “Instant cloud”.
2. Configure the Flow:
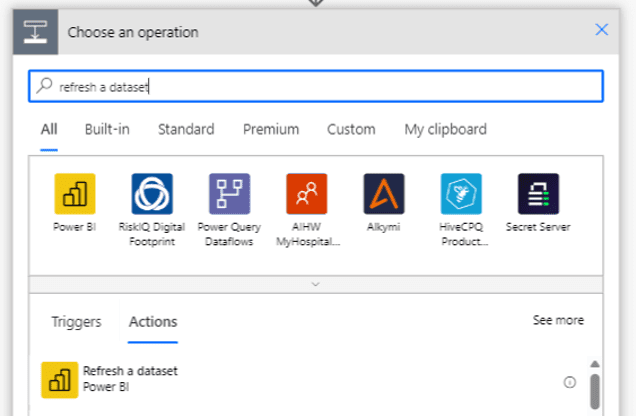
Add Action: Click “New step”;, search for “Refresh a dataset”, and
select this action from the list.
3. Set Up the Action:
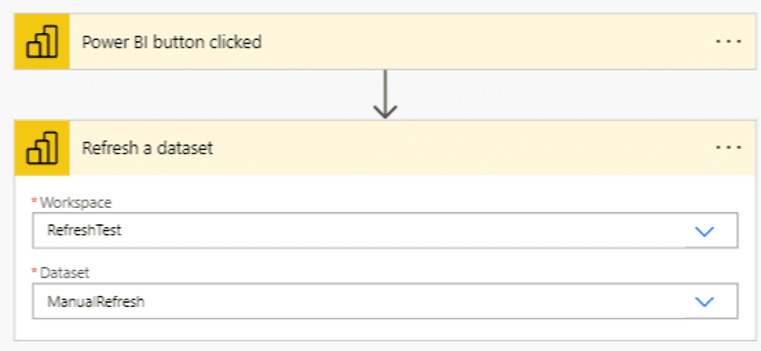
Workspace: Select the workspace where your dataset is published.
Dataset: Select the dataset you want to refresh. Ensure your report is already published and available online. If the dataset isn’t visible, log in with your account in Power BI Desktop.
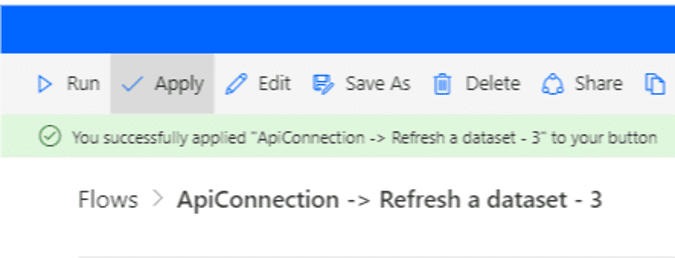
4. Save and Apply: Save your flow, return to the previous page in Power Automate, and click “Apply”. The Power Automate visual will now transform into a button with a “play” icon.
Step 4: Customize the Button
1. Edit Appearance: Customise the button to match the style of your report. You can change its text, colour, and size to make it more appealing.
Step 5: Publish and Test
1. Publish the Report: Publish the updated report with the new button to the Power BI service.
2. Test the Button: Click the button to ensure it triggers the dataset refresh.
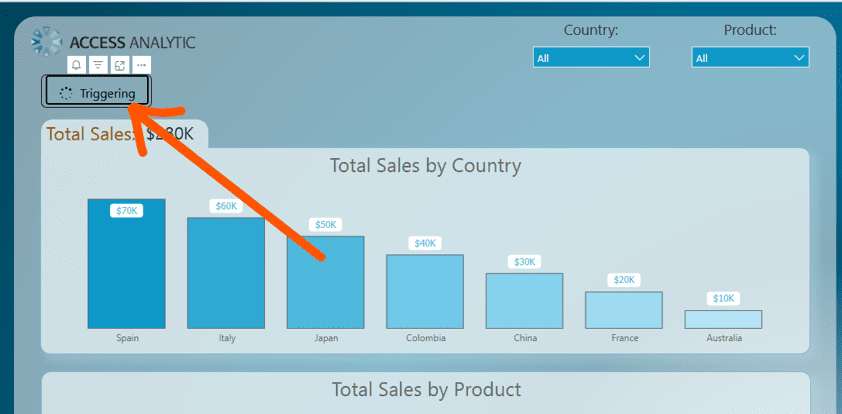
3. If it doesn’t refresh immediately, try refreshing the web page. If you get an error while trying to refresh it:
![]()
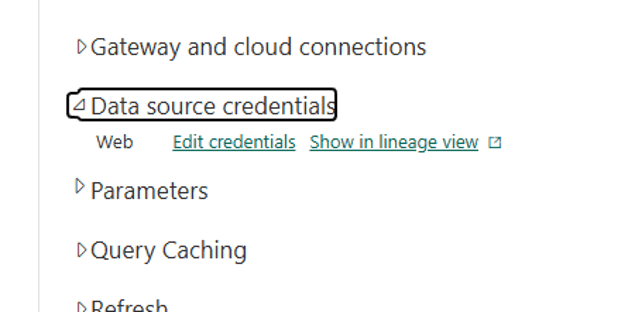
check that the Semantic Model is correctly configured and that you have entered your credentials if required:
Important Notes
Power BI has a limit on the number of Refreshes you can perform:
For users with a Power BI Pro license, you can perform up to 8 refreshes per day. If you have a Premium license, this limit increases to 48 refreshes per day. These limits apply to scheduled refreshes and those triggered by Power Automate. If you exceed this limit, you will need to wait until the next day for additional refreshes. However, you can manually refresh the report directly from the workspace as many times as you like by clicking this Manual Refresh button:

If you found this guide helpful, you might also be interested in this video from our official YouTube channel. It demonstrates how to automatically refresh a Power BI report when a new file is added to a folder, using Power Automate. Watch it here.
Happy reporting!

